PlayStation VR has made virtual reality easily accessible, especially for those who own a PlayStation 4 or PlayStation 5. However, despite the excitement that comes with virtual reality, setting up the PSVR can be a bit complicated, with multiple cables to deal with.
But worry not, as we will provide a comprehensive guide on everything you need to know about diving into the world of PlayStation VR, including a step-by-step walkthrough on how to set it up.
Prior to advancing to a higher gaming stage, it is essential to verify if you possess a CUH-ZVR1 or CUH-ZVR2 version. This will prove beneficial while configuring the device since each version has unique guidelines.
Despite the fact that PlayStation 5 recently launched a system software update in July 2022, PS VR remains unaltered.
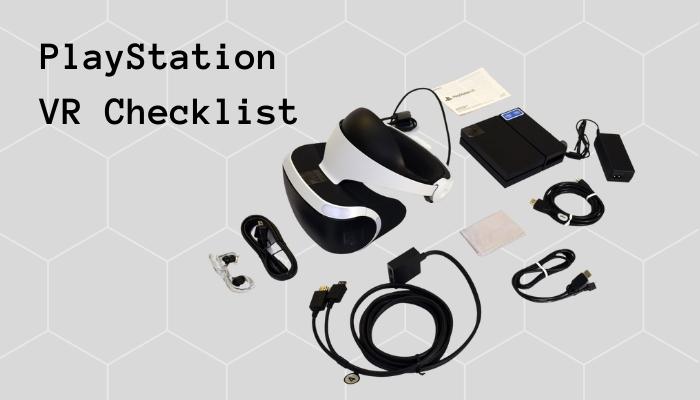
PlayStation VR Checklist:

Although you might consider this section unnecessary for a setup article, it is important to note that Sony’s PlayStation VR differs from other systems because it does not include all the necessary components in the box.
The standard bundle does not even come with the crucial PlayStation Camera needed for PSVR use. Therefore, to sum up, the following items are required to play PlayStation VR:
- A PlayStation VR bundle consisting of a headset, processor unit, earbuds, HDMI cable, USB cable, AC adaptor and cord, and PSVR headset connection adaptor
- A PlayStation Camera
- A PlayStation 4, PlayStation 4 Pro, or PlayStation 5
- Two PlayStation Move Controllers (optional but recommended)
- A PlayStation Camera adapter (needed for PlayStation 5)
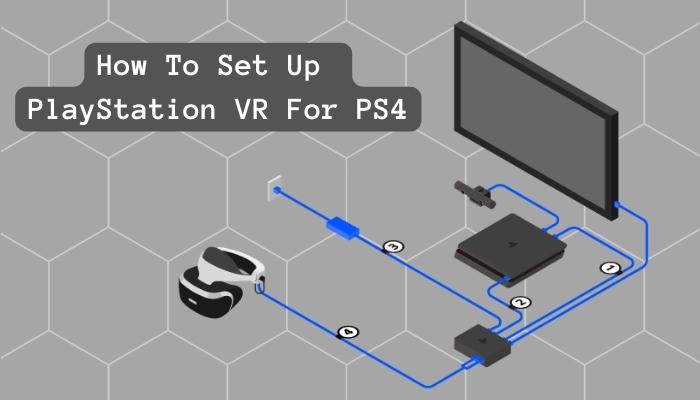
How To Set Up PlayStation VR For PS4?

Upon opening the box of PlayStation VR, you’ll immediately notice the overwhelming amount of cables and components included, not even counting the separately sold PlayStation 4, PlayStation Camera, and Move batons. This begs the question of where to even begin with the setup.
- To start, the black Processor Unit needs to be identified, and the cover should be slid to expose the rear ports. Then, connect one end of the provided HDMI cable to the HDMI output on your PS4 and the other end to the “HDMI PS4” port on the Processor Unit. Next, connect the second HDMI cable to your TV and the “HDMI TV” port on the Processor Unit.
- Finally, locate the provided USB cable and insert the small side into the rear of the Processor Unit. Then, plug the other end into a USB port on the PS4, noting that the PS4 Pro has an additional USB port on the back that is optimal for use with PSVR.
- Connect the AC power unit to the Processor Unit and a power outlet.
- Locate the VR headset connection cable and insert it into the front of the Processor Unit, ensuring that the symbols match to achieve correct alignment. Then, plug in the VR headset to the cable’s other end, ensuring that the cable and corresponding port symbols match.
- The next step is to connect the PlayStation Camera (which is not provided). Attach the PlayStation Camera cable to the appropriate port at the back of the PS4, and position the camera either above or below the TV to ensure that it has an unobstructed view of your play area.
- With all the components now connected to the PS4, it’s time to turn on the console. To set up your play area and complete the initial configuration of the VR system, simply switch on the console and follow the on-screen instructions.
After completing the aforementioned steps, you are now prepared to play in VR. If you have purchased Move batons, connect them to the PS4 using the included USB cable and press the PlayStation button to synchronize them.
How To Set Up PlayStation VR For PS5?
Unfortunately, if you currently have a functional PSVR setup, it won’t function immediately with a PlayStation 5. The good news is that the sole component required is free, and everything else remains identical.
The problem is that the PlayStation 5 lacks the custom port used by the PlayStation Camera add-on. Fortunately, Sony is giving out free adapters to all PSVR users. You only need to provide your PSVR serial number, and the firm will send you a free adapter.
After receiving it, simply attach the PlayStation Camera to the adapter and perform the above PS4 steps in the exact same manner for the PS5. Upon reaching step 5), connect the PlayStation Camera via the new adapter to one of the rear USB ports on your console, and you’re all set.
How To Position The PS Camera?

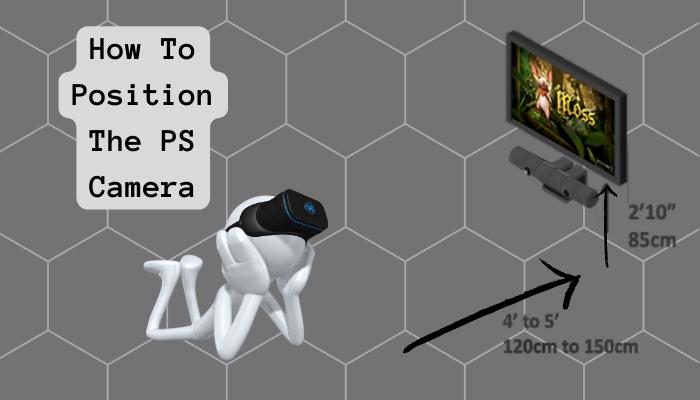
When monitoring motion, the PlayStation VR employs a single camera, and its positioning is crucial. The height and angle of the camera significantly affect its visual range and what it can perceive.
Install the camera at the same height as your head so that you can observe the PSVR headset when it is worn. If the camera is aimed upwards, it may struggle to recognize the DualShock or PlayStation Move controllers in your hands. Therefore, it is recommended to tilt the camera slightly downward.
This approach is also useful if you have limited space. Consider the camera’s field of view as a flashlight beam shining into your space; its range is also cone-shaped. You can stand closer to your TV since the camera’s field of view is now lower than before. In smaller rooms where you have to stand closer to the TV than recommended, a lower field of view is advantageous. This is because the closest point that the camera can see is now nearer to the TV than it would usually be.
The optimal distance to stand from your TV is at least seven feet, although this can be decreased by tilting the camera slightly downward.
Be cautious not to stand too close since there is a perfect spot to find. Although the camera can detect a little bit of upward, it won’t be able to see your head if you stand too close.
It’s critical to keep the PlayStation Camera out of direct sunlight since powerful light sources interfere with its ability to detect objects. Avoid placing the camera near lamps or any devices emitting infrared. During play, cover any light sources that cannot be removed.
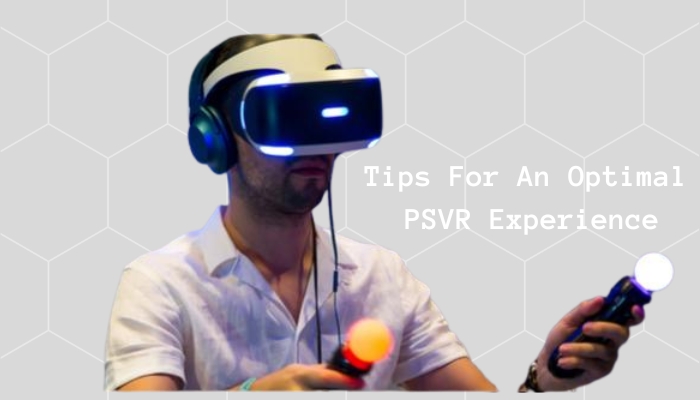
Tips For An Optimal PSVR Experience:

Once you have set up your PSVR, you may need to make some adjustments to optimize your experience. PSVR works well in most conditions, but to avoid any mishaps, you can follow some steps to make sure it runs more smoothly:
- First, clear your play area. This is especially important if your space is small. Remove any breakable items and make sure there is no clutter near your feet.
- Next, ensure that your headset fits well. Adjust the mechanism to ensure a snug fit without it being too tight. If the image appears blurry, reposition the headset.
- If you are still experiencing blurriness, you can manually set the interpupillary distance (IPD) by going to Settings > Devices > PlayStation VR > Measure Eye-to-Eye Distance and following the instructions.
- Ensure that the tracking lights are set up correctly by going to Settings > Devices > PlayStation VR > Adjust Tracking Lights and following the on-screen instructions.
- The PSVR lenses can get dirty, so it’s crucial to clean them with a microfiber cloth. Avoid using wet or abrasive materials to avoid damaging the lenses or coating.
- Ensure that your controllers are always charged. The DualShock 4 controllers usually hold a charge well, but the PlayStation Move controllers require frequent charging. Ensure they are charged before use.
- Finally, take frequent breaks. Even though it may be tempting to play for hours, taking breaks every 30 or 45 minutes is wise. This is to mop the sweat from your forehead, among other things.
And there you go! You are now fully prepared to immerse yourself in the virtual world and engage in exciting adventures and battles.
Conclusion:
In conclusion, setting up your PlayStation VR can be a bit daunting, but it’s definitely worth it for the amazing gaming experience it provides. By following the step-by-step guide and ensuring that you have all the necessary equipment, you can be up and running in no time.
Remember to take the time to adjust the headset for the best fit and to calibrate the tracking for optimal performance. Additionally, keep your play area clear of any obstacles to prevent injury or damage. With these tips and tricks, you’ll be ready to dive into the exciting world of virtual reality gaming with your PlayStation VR

I am a Chandan Tewatia and I am the founder of this blog cfindia.net. I have been in the industry for over 10 years and have worked with some of the biggest names in the business. I have a wealth of experience and knowledge to share, and my blog is a platform for me to do just that.
