Recently launched laptops usually have built-in cameras for video calls and other video recording facilities. The accurate method of the open Camera in different windows or enabling and operating the laptop camera varies greatly between computer and camera manufacturers.
Therefore you can always start by observing the suitable camera software through the search function option on your Windows-based computer. Below you will get to know how to open the camera on Laptop.
How To Open The Camera In A laptop If Your Webcam Drivers Are Installed
To open the Camera on a laptop with webcam drivers installed, follow the steps below.
1. In The Case Of Windows 10:
- To open your Camera in Windows 10, select the Start button.
- From there, you will find the All apps option. Select it.
- In the list of apps, select Camera.
- If you have multiple cameras, then you have the option to switch between them. You can do so by selecting Change Camera, which is present at the top right corner, once the Camera is opened.
2. In The Case Of Windows 11:
- To open your Camera in Windows 11, select the Start button.
- From the list of apps given, select Camera.
- You have the option to switch between cameras if you have multiple cameras. For this, you need to select Change Camera, which you will find in the top right corner once the Camera is opened.
3. In The Case Of Windows 7:
- First, select the “Start” icon to open, then click on the search box present near the bottom of the list
- Enter “webcam” in the search box and look at the suggestions.
- Select the laptop camera in Windows 7 that will appear in the search result.
- This way, your laptop camera software will start and may automatically be on the laptop camera.
Hence in this way, you can open the Camera.
How Do You Open The Camera On A Laptop If Your Webcam Drivers Are Not Installed?
If your webcam drivers are not working or installed, then in the following ways, you can use your laptop’s Camera.
- First, head to the Start button icon and click on the Control Panel option.
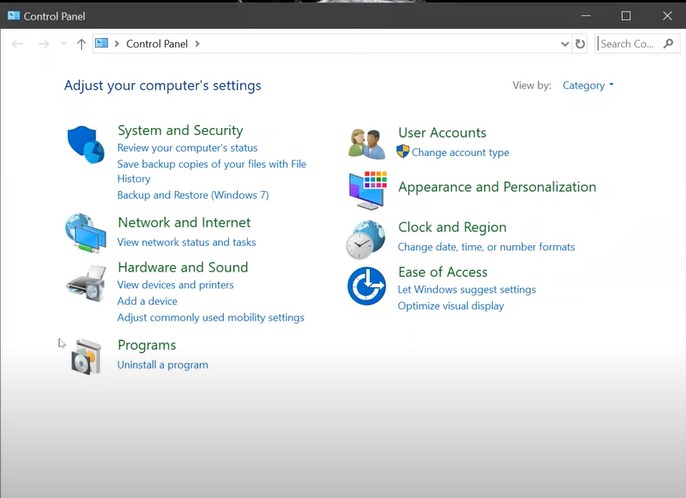
- You then need to select the System and Security option. Under this, you will find the Device manager. Select it.
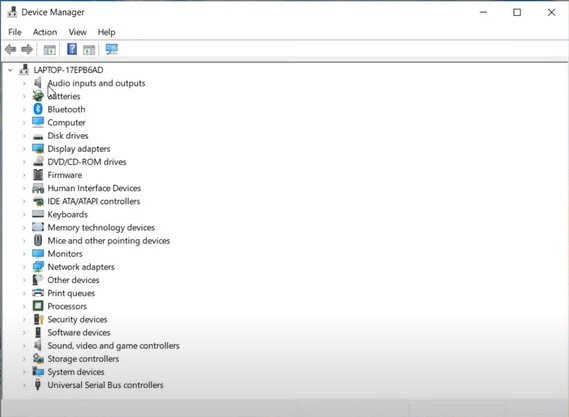
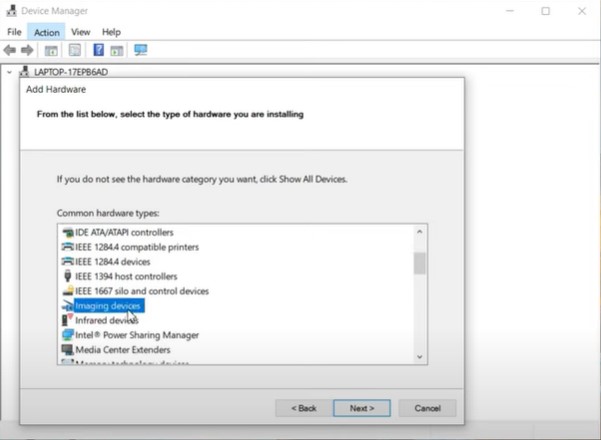
- Under the Device Manager, click on the arrow next to Imaging Devices. In doing so, the selection will expand.
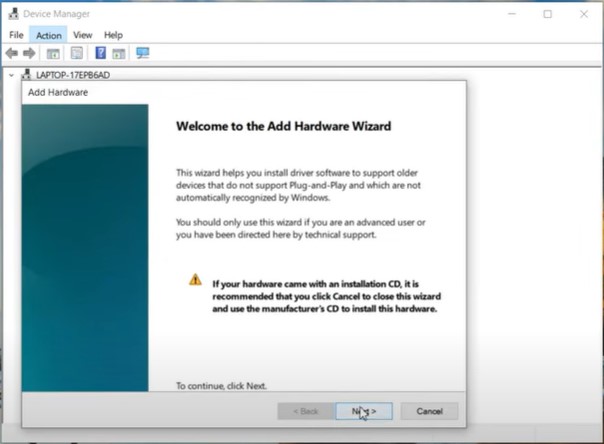
- After this, click on Sony Visual Communications Camera. Remember that it could also be listed as an Unknown device, USB Imaging Device, or USB Video device.
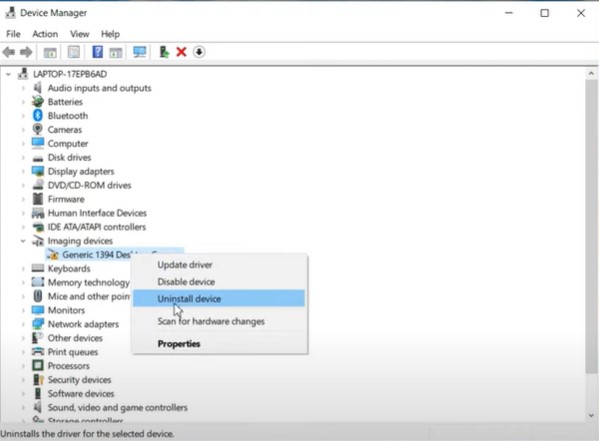
- Once done, click Action and then select Uninstall.
- You will see a confirmation box. Click the OK button.
- Select Scan for hardware changes by clicking on the Action in the menu bar again.
- Select the Close button and then restart your laptop.
You can install the drivers manually if the laptop camera is not working. To do so, follow the necessary steps that have been given below.
- As mentioned in the above steps, open the Device Manager.
- Click on it to open the laptop camera device driver.
- On the menu bar, click Action and then select Update Driver Software.
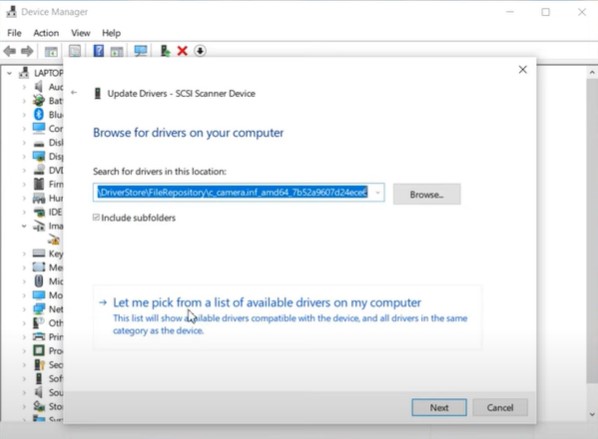
- Once done, head to browse my computer for driver software and then select the browse button.
- Find the C:\Windows\System32\drivers folder under Browse for Folder Window. Then select the Ok button.
- Confirm that Include subfolders are checked under the Update Driver Software window.
- Click the Next button and then the Close button.
- After you are done, restart your laptop.
What To Do If Your Windows Camera Isn’t Working?
A camera might not work due to many reasons. This might be due to malfunctioning hardware, missing or outdated drivers, issues with your privacy settings, or problems with your antivirus software. Hence below are a few solutions to try if your Windows camera is not working.
1. Check Out Your Antivirus Settings:
Most of the time, antivirus software can occasionally interfere with the functioning of your webcams. If this happens, try to check the software settings to see whether your antivirus prevents your Camera from launching.
2. Plugging Your Webcam Into A Different Camera:
There might be such a situation that you are using an external camera. In that case, try to plug it into another device to ensure it works. If you face problems with it on several other devices, the problem is with the webcam.
3. Check Out the USB port:
Most of the time, connection problems can occur from the computer’s end. If so happens, try to plug something else into the USB port to check out a faulty or mismapped port.
4. Check If The Correct Device Is Enabled:
If your device has a built-in camera and an external webcam plugged in, the applications can usually get confused about which one to use. Therefore head to the application’s settings to check and find the option to select your preferred device.
5. You Can Consult A Manufacturer:
If nothing works, then you can approach a manufacturer. You can check the user manual or the manufacturer’s website for external webcams. Most manufacturers out there provide troubleshooting applications that help in scanning device-specific settings.
6. Change The Webcam Settings Or Update The Webcam Drivers:
Your webcam might not work properly if the web drivers are outdated. There might also be a system setting that interferes with the function of the webcam. (Source)
Other Ways To See if Your Webcam Is Enabled:
Some other ways to check if your webcam is enabled or not are:
- First, head to the Windows Search function and then search for Device Manager. Once you have got it, select it.
- In the window that opens, head to the Cameras and select the Camera you use.
- You then need to right-click on the device and then select Update Driver.
- This way, Windows will update the driver for you to continue working properly.
Frequently Asked Questions:
In case your Camera isn’t working in Windows, some of the possible reasons might be
1. There are missing drivers after a recent update.
2. Your antivirus program is blocking the Camera.
3. Your privacy settings are not giving camera access to some apps.
4. There might be a problem with the app you are willing to use.
The shortcut key which will open the Camera on a laptop is Windows + Ctrl + e turn on or off Camera. The Ctrl + d shortcut will mute or unmute your microphone.
Install the Camera on your laptop, and insert the driver CD into your computer’s optical drive. After that, follow the on-screen instructions, which will help you to install the webcam drivers and software. You can then plug your webcam into an available USB port on your computer when asked to do so.
Did you know that there are three easy ways to launch the camera on your device? You can access it from the Lock Screen, the Power button, or the Apps Screen. Once you’ve decided on your preferred method, tap the camera icon at the bottom right of your screen and swipe up to launch the camera. It’s that simple!
Conclusion:
Hence this was the information regarding how to open the Camera on the laptop. You can also add your camera icon to your display to get easy access.
Instead of clicking to open it, you can right-click the application and then choose “Send to” and “Desktop” from the menus that will be displayed. Make sure to exit entirely out of your camera application for privacy when you are not using your Camera.

I am a Chandan Tewatia and I am the founder of this blog cfindia.net. I have been in the industry for over 10 years and have worked with some of the biggest names in the business. I have a wealth of experience and knowledge to share, and my blog is a platform for me to do just that.
